In this article, we’ll look at how to make a birthday reminder application in React JS.
Step 1: Create the react application
npx create-react-app react-birthday-reminder
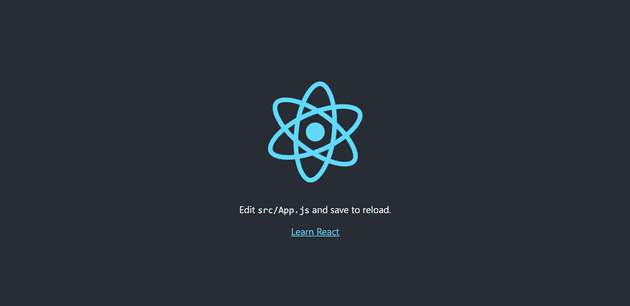
Check the application status.
cd react-birthday-reminder
npm start
This will launch your browser and start the application at localhost:3000.

Step 2: Install the required packages
In this demo application, we are going to use the Material UI component and icons. So, we need to install the required packages for that as shown below.
npm i @material-ui/core @material-ui/icons @material-ui/labNote: @material-ui/core, @material-ui/lab package contains the components and @material-ui/icons package contains the icons.
Step 3: Create the Reminder Component
Initialize the state variables
  // State variable declartion
  const [todayData, setTodayData] = useState([]);
  const [currentDate, setCurrentDate] = useState(new Date());
  const classes = useStyles();
  const todayDate = new Date();
  const birthObj = [
    {
      name: "Dragos Gontariu",
      imageSrc: `https://images.unsplash.com/photo-1558203728-00f45181dd84?ixlib=rb-1.2.1&ixid=MnwxMjA3fDB8MHxwaG90by1wYWdlfHx8fGVufDB8fHx8&auto=format&fit=crop&w=874&q=80`,
      dob: new Date(1996, todayDate.getMonth(), todayDate.getDate())
    },
    {
      name: "Sara Smith",
      imageSrc: `https://images.unsplash.com/photo-1438761681033-6461ffad8d80?ixid=MnwxMjA3fDB8MHxwaG90by1wYWdlfHx8fGVufDB8fHx8&ixlib=rb-1.2.1&auto=format&fit=crop&w=870&q=80`,
      dob: new Date(1997, todayDate.getMonth(), todayDate.getDate())
    },
    {
      name: "Smith John",
      imageSrc: `https://images.unsplash.com/photo-1541647376583-8934aaf3448a?ixid=MnwxMjA3fDB8MHxwaG90by1wYWdlfHx8fGVufDB8fHx8&ixlib=rb-1.2.1&auto=format&fit=crop&w=387&q=80`,
      dob: new Date(1993, todayDate.getMonth(), todayDate.getDate())
    },
    {
      name: "Joseph Gonzalez",
      imageSrc: `https://images.unsplash.com/photo-1507003211169-0a1dd7228f2d?ixlib=rb-1.2.1&ixid=MnwxMjA3fDB8MHxwaG90by1wYWdlfHx8fGVufDB8fHx8&auto=format&fit=crop&w=387&q=80`,
      dob: new Date(1991, todayDate.getMonth(), todayDate.getDate())
    },
    {
      name: "Jessica John",
      imageSrc: `https://images.unsplash.com/photo-1464863979621-258859e62245?ixlib=rb-1.2.1&ixid=MnwxMjA3fDB8MHxwaG90by1wYWdlfHx8fGVufDB8fHx8&auto=format&fit=crop&w=386&q=80`,
      dob: new Date(1993, todayDate.getMonth(), todayDate.getDate() + 1)
    },
    {
      name: "Julia Sean",
      imageSrc: `https://images.unsplash.com/photo-1589571894960-20bbe2828d0a?ixid=MnwxMjA3fDB8MHxwaG90by1wYWdlfHx8fGVufDB8fHx8&ixlib=rb-1.2.1&auto=format&fit=crop&w=386&q=80`,
      dob: new Date(1995, todayDate.getMonth(), todayDate.getDate() + 1)
    },
    {
      name: "Ben Parker",
      imageSrc: `https://images.unsplash.com/photo-1531427186611-ecfd6d936c79?ixlib=rb-1.2.1&ixid=MnwxMjA3fDB8MHxwaG90by1wYWdlfHx8fGVufDB8fHx8&auto=format&fit=crop&w=387&q=80`,
      dob: new Date(1997, todayDate.getMonth(), todayDate.getDate() + 1)
    },
    {
      name: "Mason Wilkes",
      imageSrc: `https://images.unsplash.com/photo-1507591064344-4c6ce005b128?ixlib=rb-1.2.1&ixid=MnwxMjA3fDB8MHxwaG90by1wYWdlfHx8fGVufDB8fHx8&auto=format&fit=crop&w=870&q=80`,
      dob: new Date(1994, todayDate.getMonth(), todayDate.getDate() - 1)
    },
    {
      name: "Kelly Sikkema",
      imageSrc: `https://images.unsplash.com/photo-1499952127939-9bbf5af6c51c?ixid=MnwxMjA3fDB8MHxwaG90by1wYWdlfHx8fGVufDB8fHx8&ixlib=rb-1.2.1&auto=format&fit=crop&w=876&q=80`,
      dob: new Date(2001, todayDate.getMonth(), todayDate.getDate() - 1)
    }
  ];
In this section, we set the variables that will be used to create the birthday reminder component.
The array of birthday data objects is represented by todayData.
The currentDate value represents the current date.
The classes variable is used to apply the style class to elements.
The todayDate variable contains information about the current date.
The birthObj contains the person’s information.
The name represents the person’s name.
The imageSrc represents that person’s image url.
The dob represents the person’s date of birth. In this case, the month and date values are set based on the todayDate value to display the data in the current date period.
Initializing the useEffect and getBirthdayData method
  // useEffect will call each time currentDate changes
  useEffect(() => {
    getBirthdayData(currentDate);
    // eslint-disable-next-line
  }, [currentDate]);

  // Filtering the current date data
  const getBirthdayData = (date) => {
    const filtedData = birthObj.filter(
      (obj) =>
        obj.dob.getDate() === date.getDate() &&
        obj.dob.getMonth() === date.getMonth()
    );
    setTodayData(filtedData);
  };
When the currentDate value is changed, useEffect is called.
The getBirthdayData method filters birthday data based on the passed date. This function compares the passed date, month, and date value to the property dob date and month value and returns the result.
Adding required methods
// Calculating the age
  const getAge = (dob) => {
    const todayDate = new Date();
    const diff = todayDate.getTime() - dob.getTime();
    return Math.floor(diff / (1000 * 60 * 60 * 24 * 365.25));
  };

  // Handles the next date navigation
  const handleNext = () => {
    const nextDate = new Date(currentDate.setDate(currentDate.getDate() + 1));
    setCurrentDate(nextDate);
  };

  // Handles the previous date navigation
  const handlePrev = () => {
    const prevDate = new Date(currentDate.setDate(currentDate.getDate() - 1));
    setCurrentDate(prevDate);
  };
The getAge method computes age based on the passed date of birth.
When you click on the next arrow icon, the handleNext method is called and the current date value is updated.
When you click on the previous arrow icon, the handlePrev method is called and the current date value is updated..
Rendering the elements
// Rendering components
  return (
    <Box className={classes.boxRoot}>
      <List
        className={classes.listRoot}
        subheader={
          <ListSubheader
            component="div"
            className={classes.headerRoot}
            disableSticky
          >
            <Typography variant="h6">
              {`${
                !todayData.length
                  ? "No Birthday"
                  : `${todayData.length} Birthday's`
              } Today`}
            </Typography>
            <Box className={classes.headerIcon}>
              <KeyboardArrowLeftTwoToneIcon
                onClick={handlePrev}
              ></KeyboardArrowLeftTwoToneIcon>
              <KeyboardArrowRightTwoToneIcon
                onClick={handleNext}
              ></KeyboardArrowRightTwoToneIcon>
            </Box>
          </ListSubheader>
        }
      >
        {todayData &&
          todayData.map((bObj) => {
            return (
              <ListItem key={bObj.name} className={classes.listItemRoot}>
                <ListItemAvatar>
                  <Avatar className={classes.avatarRoot}>
                    {bObj.imageSrc ? (
                      <img
                        className={classes.avatarImg}
                        src={bObj.imageSrc}
                        alt={bObj.name}
                      />
                    ) : (
                      <Skeleton variant="rect" width={75} height={75} />
                    )}
                  </Avatar>
                </ListItemAvatar>
                <ListItemText
                  primary={bObj.name}
                  secondary={`${getAge(bObj.dob)} Years Old`}
                />
              </ListItem>
            );
          })}
      </List>
    </Box>
  );
};
In this case, the Box component serves as a container element.
The Material UI List component is used to display the details of the birthday person, who is celebrating his birthday on that specific date.
The ListSubheader component is used to display the subheader in addition to the header.
The title text is displayed using Typography component.
The KeyboardArrowLeftTwoToneIcon renders the left arrow icon.
The KeyboardArrowRightTwoToneIcon renders the right arrow icon.
The ListItem component is used to render each list item individually.
The ListItemAvatar component is used to display the avatar image in the list.
The image is rendered using the Avatar component.
Before loading the image, the Skeleton component displays a placeholder preview.
The ListItemText component is used to display list item text.
Adding Styles
const useStyles = makeStyles((theme) => ({
  boxRoot: {
    display: "flex",
    flexDirection: "column",
    justifyContent: "center",
    alignItems: "center",
    height: "100vh",
    backgroundImage:
      "linear-gradient(to right bottom, #6882fe, #6a89fe, #6e90fd, #7297fc, #789efa, #759cfa, #7399fb, #7097fb, #658afc, #5e7cfd, #5a6efb, #5a5ef9)"
  },
  headerRoot: {
    fontSize: "larger",
    color: "black",
    borderRadius: "inherit",
    display: "flex",
    alignItems: "center",
    justifyContent: "space-between",
    padding: "1rem"
  },
  headerIcon: {
    alignIitems: "center",
    display: "flex",
    justifyContent: "flex-end"
  },
  listRoot: {
    width: "100%",
    maxWidth: 320,
    backgroundColor: theme.palette.background.paper,
    borderRadius: ".5rem"
  },
  listItemRoot: {
    gap: "1rem",
    height: "84px"
  },
  avatarRoot: {
    height: "70px",
    width: "75px",
    borderRadius: "30%"
  },
  avatarImg: {
    height: "75px",
    width: "75px",
    objectFit: "cover"
  },
}));
The boxRoot represents the page’s background style.
The sub header style is represented by the headerRoot.
The Arrow icon styles are represented by the headerIcon.
The List component style is represented by the listRoot.
The listItemRoot represents the styles of the list items.
The avatarRoot represents the Avatar component’s style information.
The avatarImg variable represents the avatar image style information.
The codesandbox sample is available at the following URL, and it was created using the code snippets mentioned above.
https://codesandbox.io/s/awesome-tereshkova-2pkei
Happy Learning!